A developer guide for building objects compatible with the Reality Editor. (Work In Progress)
Arduino Yun Example
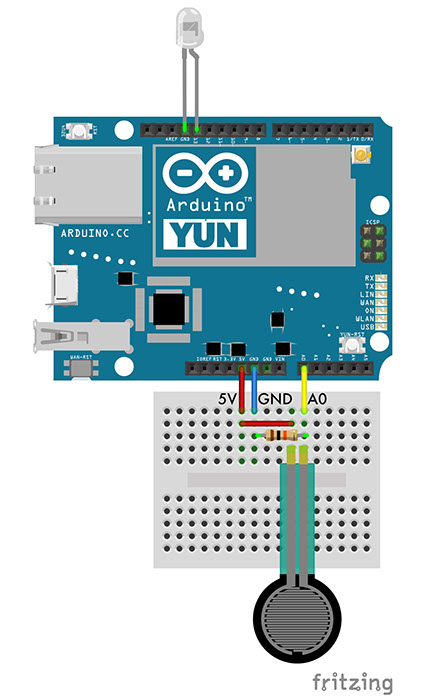
Sensor, LED, AR Slider
For this example, you will create a hybrid object by assigning a marker image to your object and uploading a sketch to your Arduino. For this example, you will create a new interface. You can find more information on how to assign a new interface to your hybrid object here. Once your object is created, you can virtually change the brightness of the LED and link the Arduino’s sensor to the led and see the physical object react. Once the link is created, the LED on your Arduino will light up when the sensor is touched. When the virtual IO link between your sensor and LED is cut, the led will no longer respond the the sensor.
Connect the long leg of the LED to the 220 Ohm resistor. Plug the short leg from the LED in to GND and the other side of the resistor in to pin 13.
Connect one side of the force sensor to 5V and the other side to the 10K Ohm resistor and the A0 input. Connect the other side of the 10K Ohm resistor to GND.
Hybrid Object
Target
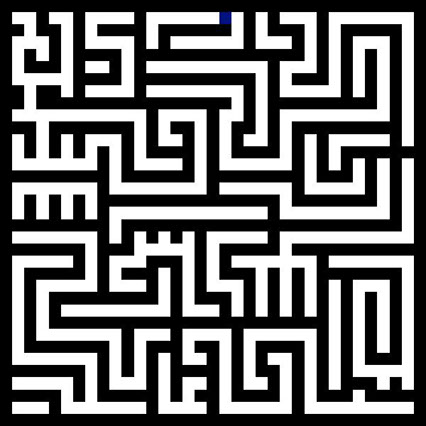
Follow these guidelines for creating your object and adding a target image. This marker or target allows the computer vision software to correctly identify your object. Each object that you create needs to have a unique target attached to it. An appropriate target image is one with many edges and without repeating patterns. You can use the image on the right as your target image or just any image you like or photo of surfaces that you like.
You can also find more prepared targets in the Library File. You can also use hrqr.org to generate targets easily.
Arduino
Once your target is uploaded, you can now point your device at the target image and see that there is already a starting page. However, in order to reprogram and interact with your hybrid object, you must first link you Arduino with your interface by generating IO-Points and
send data from the Arduino to these IO-Points. The sketch on the right side is doing this job.
You can find a more detailed explanation for this sketch here.
A general detailed explanation for all functions can be found in the reference.
/*
created 2015
by Valentin Heun
*/

#include
HybridObject obj;

void setup() {
    obj.developer(); // allow developer tools
    obj.add("slider", "led"); // add a new I/O Point
    obj.add("slider", "sensor");
}

void loop() {

    // Read from sensor
    float reading = obj.map(analogRead(A0), 0, 940);

    // Write to Object
    obj.write("slider", "sensor", reading);

    // Read from Object
    analogWrite(13, obj.read("slider", "led") * 255);

    delay(30);
}
Web
Now it is time to add an interface. You can find all the information you need to add an interface to your hybrid object here. Be sure to title your file index.html. A detailed explanation for all JavaScript functions can be found in the reference.
Additionally, you will have to drag and drop the object.js file along with this objectIO.js file to the “Add Interfaces” page. you will find both files in the sensorAndSlider example folder.
Adding a Target
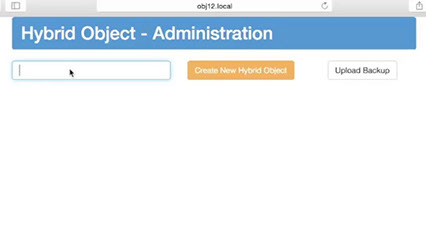
To create a Hybrid Object through the developer interface, access the following address with your web browser:
http://[arduinoName].local:8080/
Your arduino name is the name you defined in the setup of your arduino board. If you have not made any changes to the name, this name is simply “arduino”.
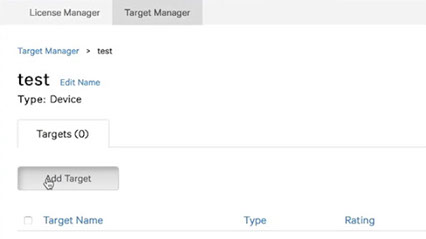
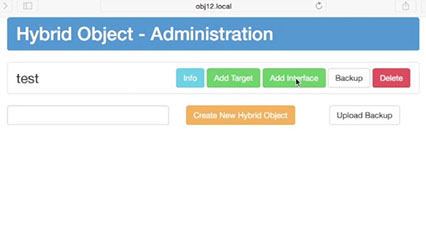
To create your first object, simply enter your desired object name into the empty field and click “Create New Hybrid Object.”
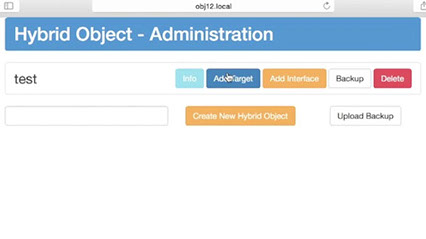
Once you have created your object, it should appear in the list of objects in your browser. This tutorial will be working with an object named “test.”
The color of the “Add Target” and “Add Interface” buttons tell us that we have begun to create a hybrid object, but we have not completed its creation. In a completed object, both buttons appear green. Once we have added an interface and a target to our object, the object will be live and the buttons will be green.
Add a Target to an Object
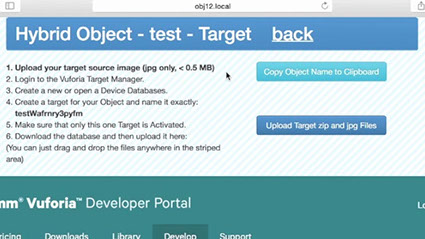
A target is an image that allows the computer vision software to correctly identify your object. Each object that you create needs to have a unique target attached to it. An appropriate target image is one with many edges and without repeating patterns. Your image file MUST be a JPG file. Other image formats ARE NOT compatible. To add a Target to your object, hit the “Add Target” button in the row associated with the object you wish to alter. You should find the following page.
First, drag and drop your image JPEG target onto the striped area of the page. Second, proceed with the Vufoira Target Manager.
Vuforia Target Manager
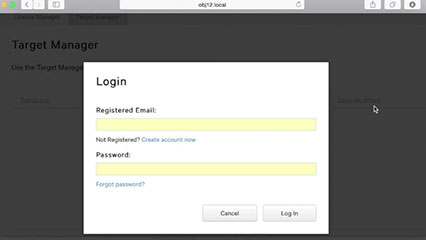
If you have already created a Vuforia Target Manager Account, log in now. Otherwise, follow the included instructions to create a new account.
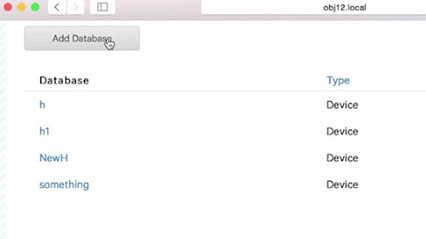
Once you have logged into the embedded Vuforia page, click the “Target Manager” button in the main menu. You will now be able to create your own database by clicking the button “add Database”.
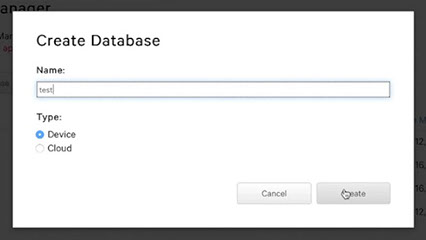
You will be asked for a Name and Type. Choose a name and select “Device” as Type.
After you create and name your new database, a new link to your database should appear on the page. Click on your new database. The database created for the purposes of this tutorial is named “test”
Now you can add your target image to your database. Click the “Add Target” button.
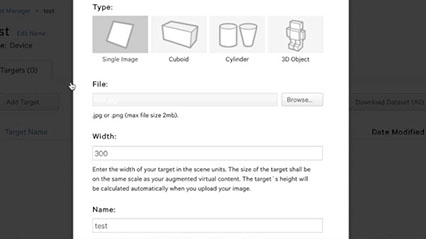
In the Add Target menu, the name of your target should be copied from the fourth bullet point at the top of the main page, which has created a unique target name for you.
Select “Single Image” from the options for “Target Type.” Enter the value 300 for the width of the new target.
You can choose a target image from the target image folder provided in the Examples, which you downloaded earlier. Any of these images will work as a target for your new object.
Complete the creation of your new target by clicking the “Add” button, then return to the main database page that you created earlier.
Now you can add your target image to your database. Click the “Add Target” button.
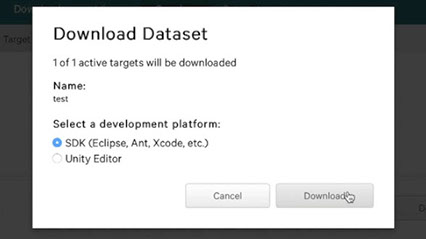
On the new database page, you can now select your newly created target. Do so, and then click the “Download Selected Targets” button. Select SDK to download your new target as a .zip file.
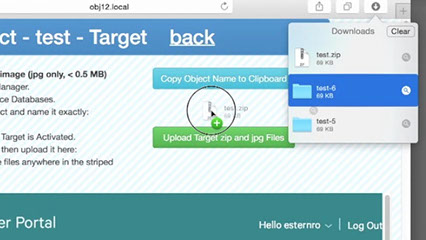
Once you have downloaded the .zip file of your database, drag and drop it anywhere in the striped area at the top of the page. This will finish the process of adding a target to your object.
Click the “Back” link at the top of your screen to return to the main page. After creating an interface and uploading the vuforia target and the jpg target image for your new object, the “target” and “interface” buttons on the main page should change to green.
Add an Interface to the Object
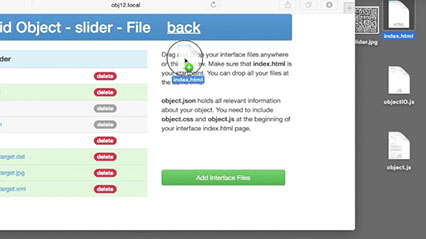
The interface of a Hybrid Object is what a user will see augmented onto a Hybrid Object. To add an interface to your Hybrid Object, click the “Add Interface” button in the row of your newly created object.
The Object allready has a “hello world” example stored. The index.html embeds the bird.png image into the webpage. The name index.html indicates that this file is the starting point. The object.js file always needs to be included in your project. It provides functions that allow the Reality Editor to communicate with the Hybrid Object.
If you want to add a new interface to the page, simply drag and drop your new pages into this page. They will overwrite the previous files.
Let’s take a closer look at the index.html file.
The script tag including object.js is necessary for your HTML page to interact with the Hybrid Object. For this reason, it should not (and cannot) be deleted in order to function. Otherwise, anything in this file can be altered. This particular file tells us to expect the bird.png image to appear when we use the interface. Always make sure that you add object.js to your interfaces.
Once you are satisfied with your interface files, you can move on to interacting with your Hybrid Object. Remember you can always come back and alter your object’s interface later! Click the “Back” link to return to the main page.
Using Your Device with a Target
When you are ready to interact with your Hybrid Object, open the Reality Editor App on your device.
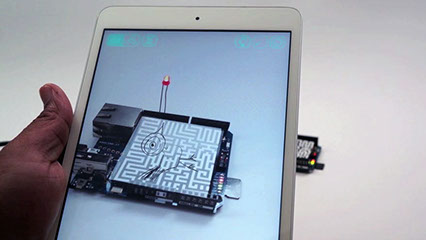
Next, point your device at the target image you have chosen for your object.
When you point your device at your chosen target image, you will see the content of you index.html file (the HTML file in the object’s Interface) appear.
To scale all interfaces, you can push the Developer button (the third icon on an iPad or the last icon on an iPhone) to get in to a menu where you can switch on the developer mode.
Once you have switched the mode, you will be able to move interfaces around by simply dragging them with a finger. For scaling the interface, use one finger to select the interface and the second finger to change the scale.
Adding IO-Points with the Arduino Yun
Once you have created your object and added a marker as well learned about how to add web content, the next step towards creating a Hybrid Object is to link the Arduino that you have set up as your object to the Reality Editor using so called IO-Points.
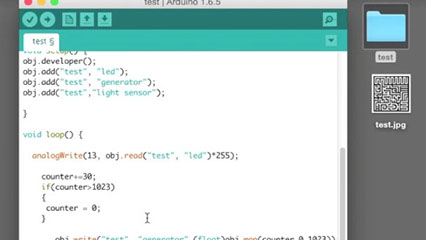
For this example, we are using a file called test.ino. When uploaded, this sketch will cause the led to blink when connected to the generator.
Here is the code:
/*
Read from and Write to a Hybrid object

created 2015
by Valentin Heun
*/

#include
HybridObject obj;

int counter =0;

void setup() {
 obj.developer();
 obj.add("test", "led");
 obj.add("test", "generator");
 obj.add("test","light sensor");
}

void loop() {

 analogWrite(13, obj.read("test", "led")*255);

 counter+=30;
 if(counter>1023)
 {
 counter = 0;
 }

 obj.write("test", "generator",(float)obj.map(counter,0,1023));
 obj.write("test", "light sensor",(float)obj.map(counter,0,1023));

 delay(30);
}
Here’s what the code means:
HybridObject obj : This is your hybrid object.
obj.developer() : This line allows you to use the developer functions with your hybrid object.
obj.add(“test”,”led”) : This line creates a new IO-Point in the hybrid object named “test” and associates the name “led” to it.
obj.read(“test”,”led”) : This line allows your object to read from the IO-Point. You never have to indicate if it is an input or an output, that work will be done for you.
analogWrite(13, obj.read(“test”,”led”) *255) : analogWrite allows you to write to a pin on your Arduino. In this case, we are telling the Arduino’s 13th pin to be written to by what we read from the “led” IO-Point.
As such, there are 4 simple functions to interact with your Hybrid Object:
.developer()
.add([ObjectName], [I/OName])
.read([ObjectName], [I/OName])
.write([ObjectName], [I/OName], value)
Linking IO-Points via the interface
Make sure that your computer, iOS-Device and Arduino Yun used in this tutorial are in the same private local Network. Cooperate Networks are not supported.
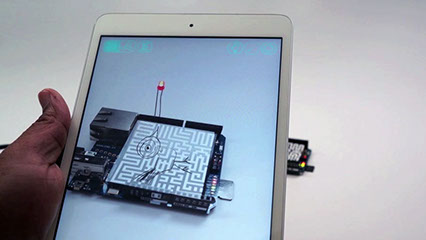
Now we can return to the Reality Editor app.
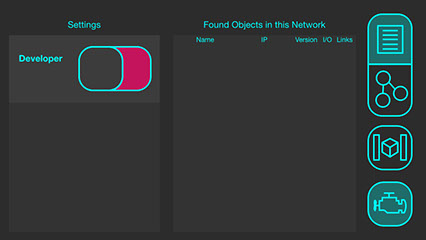
The app has two different modes to interact with what it is visually processing. So far, we’ve been operating under the first selection:
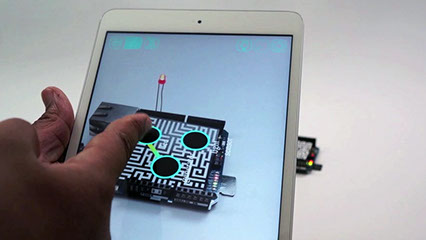
But now that we have added IO interactions to our object, we can hit the second button in the right-hand corner. This view will allow us to link IO points that we have attached to our device.
Now we can connect our “generator” IO to the “led” IO that we created in the Arduino code. When we do this, we will see that the led on our Arduino will begin to reflect the code. To create this connection, simply drag from the “generator” IO to the “led”. After doing this, you should see a link like in the screenshot below.
This link is telling you that the “led” object is taking the “generator” object as input.
To break a link, simply drag your finger over the link itself.
You can also create links between entirely separate Hybrid Objects. For instance, we could connect the “sensor” IO from one object to the “led” IO on another.